#grindyourown

IMG_1809

Last year, during a beautiful moment of cosmically-aligned kismet, a group of ladies and I were able to host a few gatherings at my house in St. Louis,  dubbed the Kitchen Speakeasy. I know, I know, It’s a pretty hipster name – but I really did capture the nature of this culinary market. These markets consisted of a few very old friends, some recent acquaintances, and brand new friends (which were, by the way, all women) and we sold things from jams and jellies to house-cured bacon to the most heavenly granola.

It was a few months of blissful, lady charged, culinary goodness. People wandered in, sampled goodies, and left with a bag of the finest South City kitchens had to offer. We felt fueled by each other, spending much of the day swapping kitchen war stories or tips on how to make yogurt or how to get that perfect color of hot sauce. Not to mention the feeling of pretty much selling out of product at every market. This band of fiery culinaristas could not be STOPPED.

IMG_1796

IMG_1798

IMG_1795

Our homemade goodness would stick it to the man! It would change the world! It would bring about revolution!! Our Wild Cultured Yogurt and butcher paper wrapped English Bacon would cause people to rethink the grocery store, rethink their buying power, rethink their food life.

Our small batch Lime Honey Mint Butter and Fresh Wheatberries had brought us to the food promised land, a place where Balsamic Strawberries or Vermouth Mustard could illicit smiles and blissful moments. A place where our Bourbon and Strawberry Jam could be appreciated. Our hard work could be seen, shared, sold, and traded. A place where we could live forever!

IMG_1800

IMG_1802

IMG_2029

IMG_2022

IMG_2044

IMG_2048

IMG_2030

IMG_2033

hot sass

orange wiz

But, alas, even after all the dramatic thinking – it did end. Not for any reason really, just sorta fizzled out. We all had shit to do. But the Kitchen Speakeasy is actually not the point of this blog post. It was just a stage set for one of the many things I learned from these smart ladies: you can totally grind your own wheat.

Now, I’m not saying “If you go buy a big bulky expensive grinder, and some fancy ingredients – you can grind you own wheat.” I mean to say, if you have a coffee grinder and some wheat berries – You Can Grind Your Own Wheat. This all started when I got a big bag of organic wheatberries from Amanda at Moonlight Farm.

IMG_2025


I was ever so grateful to have another grain in my pantry, but I have to admit I get a little sick of wheatberry salad. The wheatberries just never get soft enough and that pop and crunch of a boiled wheatberry is only to be enjoyed every once in a while. I might, being the truth-sayer that I tend towards, have said this to Amanda. Luckily she found no offense in my rude remark and instead simply said, “Just grind them into flour.”

What?! WHAT!?!

Like the holy grail!? Fresh milled flour!?! In my kitchen!?! IMG_2079

Yes. As easy as that. Take the wheatberries, put them in a coffee grinder, and go. FRESH MILLED FLOUR.


IMG_2080 IMG_2085


The flour is pretty much perfect. I have used it from yeast breads to quick breads to crackers and it adds a beautiful fresh and sweet flavor, not to mention a great texture. Why does it matter, you ask?! Fresh milled, who cares!!

Well, my dearies, here is a little info about fresh ground whole wheat flour from the owner of Moonlight Farm herself, Amanda:

Before we get to specifics, let me just say that fresh-ground flour was a bit of a revelation for me. I have always hated whole wheat pastry…to the point of causing a severe case of pastry-rage at times. Pastry should be buttery, flakey, cakey, moist, chewy, and several other desirable things…but wheaty and bran-y it should neverevereverever be. I hated that *tang* that whole wheat flour seemed to impart to my beloved baked goods.

But, then, I married a wheat farmer and discovered what freshly ground flour truly tastes like. I had no idea that the whole wheat flour on the shelves at the store was all at least slightly rancid (not in a dangerous way, mind you…). I didn’t know the oils in the wheat itself had such a short shelf life! Using fresh-ground flour in your recipes will, indeed, give them a bit more heft (and health) – but it does not have to take away or impede that sweetness we expect from our baked goods. The oils are fresh and mild, the wheat is nutty and delicious. It’s a win-win.

Her advice on grinding:

We currently use a Kitchenaid stainless steel coffee grinder (saving up for a countertop grain mill has taken us a bit longer than anticipated…but…for small amounts at a time, it’ll do). We bought our model at Target and it has been our favorite so far – the best part being the removable stainless grinder cup. Much easier to get all the good stuff out and much easier to clean.

Every coffee grinder has a max amount of time it should be used (if it doesn’t have an automatic shut-off), so please pay attention to the manufacturer’s instructions. If your grinder starts to get seriously heated, stop and give it a 20 to 30 minute rest. Once again, for small amounts, this shouldn’t be a problem.

We fill the grinder about 2/3 up to the max fill line and grind away. We usually do two or three 10-12 second grinds per fill. Once you have the amount you need, you can do one of two things – go happily about making your recipe, or, sift out a bit of bran and re-grind for finer flour. You can just use a fine-mesh sieve and sift the flour, pushing and rolling the flour around a bit. Just sifting can give you a finer/less bran-y flour, so you may not even need to re-grind. Now you have fresh flour. Store it in an airtight container in the fridge to keep fresh. If it’s used within a week, you will still be able to enjoy that fresh-ground taste!

She also shared a great recipe with us, for her most delicious Honey Whole Wheat Shortbread!

This shortbread is THE most versatile shortbread. Ever. There is nothing this little buttery golden round cannot do. Need breakfast? Eat it plain, butter it, or jam it. Need bread for soup? Totally works. Craving a melty savory snack? Throw on some roasted ham and your cheese of choice and broil and happy days are here again.

1/2 c FRESH GROUND whole wheat flour

1/2 c unbleached white flour

2/3 c (5.5 oz) unsalted butter, room temperature

1/3 c honey (local honey is perfect, but this is an excellent time to experiment with different varieties, as the flavor really shines here)

1/2 tsp kosher salt


*Parchment line and butter an 8 inch round cake pan or spring-form

*Pre-heat oven to 325 F

*Mix flours and salt in a small bowl until well combined.

*Cream butter and honey in a mixer or by hand until light and fluffy.

*Add flour to butter to create an even mixture. This doesn’t take long at all, so don’t overdo the mixing.

*Using a silicone spatula, plop and spread dough evenly in your pan.

*Prick dough all over with a fork. (if your fork is sticking/pulling the dough too much – dip it in some flour between pokes)

*Bake for about 25-30 minutes.

You’re looking for a nice slightly puffed golden brown and a heavenly honeybutter smell. It will still seem a bit soft and cakey, but it will get denser as it cools. Invert on a plate or board after it’s cooled for about 10-12 minutes. You may find you want a softer or more crumbly consistency – just bake for a shorter or longer amount of time until you find your perfect texture. Cut into wedges and enjoy. Tightly wrapped, this will keep on your counter for 2-3 days, in the fridge for a week, and in the freezer for 2-3 months.

So there you are. One more way to make your kitchen a culinary wonderland. Enjoy and keep cooking!!!


been gone – but I’m back now.

I’ve spent the last few months on the road – from coast to coast in our pickup truck. There are stories, pictures, and recipes to come….

Until then, here’s a current obsession:
Wellness Mama – an awesome blog with great natural recipes from toothpaste to shampoo to cleaning products, helpful hints on making your life simple and healthy

Holy Granoly.

Most of my life I’ve been like, “What’s the big deal about granola!?” Even when we made it at Local Harvest, I thought “this is good, but….I don’t get it.”

Until recently when I couldn’t afford $4 boxes of cereal (and frankly didn’t want to eat that sugar laden, preservative filled, GMO’d stuff) and needed another option. Once I made my own granola, I was blown away by how delicious it was. Maybe because I made it myself, or maybe because I took care in choosing the ingredients – but whatever it was, I hadn’t eaten granola so satisfying before.

Since I started making granola in my own kitchen, I can’t stop eating the stuff. And I can change the flavor as much as I like and I control the ingredients completely. After about five months of eating it, I’m not sick of it yet.

IMG_1967

Granola is simple. Generally it is just oats (old fashioned rolled oats – not instant or steel cut) and nuts, covered in a mixture of sweet (sugar, molasses, honey) and fat (oil, butter) then baked for a short time. I recently made three different granolas, to show you the range of fats and sugars you can use – as well as the different things you can throw in, from nuts to dried fruit. These recipes yield a very small amount of granola, I usually make about 3 or 4 times this much and it lasts for at least a month in an airtight container.

The basics of granola making are: heat sugar and oil mixture (with other flavors if you desire), stir into oats and nuts, spread on cookie sheet(s) and bake at 250 – 300 degrees for about an hour, mixing and rotating often. Once it has cooled, mix in dried fruits, chocolate, or anything else you want to use raw.

IMG_1944

Honey Butter Granola

This is a light granola with a subtle flavor, the honey gives it just a slight sweetness.

1/2 c honey

4 Tbl butter

1/2 tsp vanilla

pinch of salt

2 c oats

1/2 c pecans (raw and chopped)

1/4 c sunflower seeds (I used roasted, but you can use raw)

1. Place honey, butter, vanilla, and salt in a small pot – heat until butter is melted and everything is combined.

2. Place oats, pecans, and sunflower seeds into a bowl – stir in honey butter mixture.

3. Once well mixed, spread onto cookie sheets in a thin layer and place into a 250 degree oven.

4. Turn pans stir granola every 20 minutes for an hour. The granola will still seem soft, but once it dries it will harden into perfectly crunchy granola.

IMG_1955

Molasses Hazelnut Granola

This is a darker granola, with a richer flavor. I love using unsulphured molasses for it’s complicated flavor and it nutrients. Reminds me of gingerbread a little bit. 

1/4 c brown sugar

2 Tbl unsulphured blackstrap molasses

2 Tbl grapeseed oil

1/2 tsp cinnamon

pinch of salt

2 c oats

1/2 c hazelnuts (chopped)

1/4 c flax seeds


1. Place brown sugar, molasses, oil, cinnamon, and salt in a small pot – heat until everything is combined.

2. Place oats, hazelnuts, and flax seeds into a bowl – stir in sugar oil mixture.

3. Once well mixed, spread onto cookie sheets in a thin layer and place into a 300 degree oven.

4. Turn pans stir granola every 20 minutes for an hour. The granola will still seem soft, but once it dries it will harden into perfectly crunchy granola.

IMG_1957

Super Seed Granola

This is called Super Seed, not only because I used a couple different kinds of seeds, but I also used a Garden of Life product called Super Seed to add flavor and fiber to this granola. This granola uses coconut oil and agave, giving it an interesting flavor.

*Note: you can replace the 1/4 c brown sugar with 1/4 c agave.

1/4 c brown sugar

2 Tbl coconut oil

2 Tbl agave

pinch of salt

2 c oats

1/4 c Super Seed

1/4 c sesame seeds

2 Tbl pinenuts

1/4 c pepitas

1. Place brown sugar, agave, coconut oil, and salt in a small pot – heat until everything is combined.

2. Place oats, Super Seed,sesame seeds, pine nuts, and pepitas into a bowl – stir in agave oil mixture.

3. Once well mixed, spread onto cookie sheets in a thin layer and place into a 250 degree oven.

4. Turn pans stir granola every 20 minutes for an hour. The granola will still seem soft, but once it dries it will harden into perfectly crunchy granola.

IMG_1958


Go crazy! Try anything! Let me know how it works out.

And if you don’t want to make your own, Sarah Kate makes amazing granola for sale various times of the year – I suggest getting yourself a bag (she evens ships it).

Sprouts: A little life in the dark days

I have taught a few Raw Foods classes over the years, though I would not call myself an expert, I have done some research on this subject. One of the things that almost always gets people to sign up for my classes is Sprouting! Lentils Sprouting seems to hold an intense fascination with people today, and I completely understand. To me it sort of fulfills that human desire to create, to watch things grow. Since most of us have a million excuses not to actually grow our own vegetables, we can at least sprout some lovely shoots on our kitchen counter with little to no effort in a matter of days.

Instant gratification. Fresh Food. Micro Farming.

I find myself doing most of my sprouting in the days of winter – when sunlight and fresh food is scarce. The ground is frozen and the sky is slate gray, but my little sprouting trays are teeming with life.

Separating my sprouting into two different types makes my brain a little happier, as I like to sprout some from (A) and some (B) at the same time (in different containers) so that I have sprouts to munch on and sprouts to cook with. (These are just a few of my favorites out of 100’s of things to sprout.)

Sprouts that I can eat whole and raw (A) and Sprouts that have to be cooked or the seed removed (B).

(A) group includes thing like Flax, Wheat and Rye Berries, Radish, Broccoli, Cabbage, Alfalfa, Almonds, Black Sesame

(B) group includes things like Sunflower Seeds, Mung Beans, Black Beans, Kidney Beans, Lentils, Brown Rice

Sprouts are incredibly easy to grow – you can honestly use a wet paper towel (like the experiment you did in grade school, remember)! But here are few methods that most people prefer (click photos and link to the site they are from):

Jars with cloth or net over the top.  (click photo to find site this photo is from)

Jars with cloth or net over the top.

Hemp Bags

Hemp Bags.

Or my preferred method: Sprouting Tower with Trays!!

Or my preferred method: Sprouting Tower with Trays!!

This sprouting tower basically just “fills itself” – I pour water in the top (the top is the white tray on the left) and it fills and then empties into the next tray by the use of the magical force of gravity, and repeat on each level until all the excess water is trapped in the last tray until I empty it. The ridges on the bottom of each tray ensures that the seeds remain moist but not too wet.

Recently I sprouted flax seeds, black lentils. and wheat berries,

IMG_1654with quick and wonderful results,

IMG_1672

Day Two Wheat Berries

IMG_1673

Day Two Flax Seeds

IMG_1674

Day Two Black Lentils

that just kept growing.

IMG_1677

Day Three Wheat Berries

IMG_1676

Day Three Flax Seeds

IMG_1679

Day Three Black Lentils

AND SOME WOULDN’T STOP!

IMG_1641

The science and nutrition around sprouting is quite simple (and a super old practice). First of all seeds (and this includes nuts, beans, legumes, and grains) are routinely eaten in their whole or ground form – but you are actually missing a lot of the nutrition that is contained within these little things. Since seeds carry around the beginnings of new life, they store huge amounts of highly concentrated nutrition to help a little sprout start and make it into the ground – where it can begin to draw nutrients from the soil. This “highly concentrated nutrition” is actually protected by carbohydrates and insoluble fiber, to basically make it harder for others to access and easier for the seed to “sleep”. With the process of sprouting, or waking the seed from nutritional hibernation, you jump-start a reaction in the seed that (a) begins photosynthesis, (b) enzymes begin to metabolize the carbs and fiber to gain access to the more nutritious amino acids, proteins, minerals, and vitamins, and (c) causes the seed to start to grow.

It’s an ingenious plan of nature to make these plant babies so self-sufficient, simply carrying its first few days worth of food around with it. And to get at that wonderful nutritive food is easy! Easy as stealing candy from a baby, a baby sprout plant that thinks it is going to use all that energy and nutrition to grow into a plant.

To wake these seeds up you need two things…come on! think back….fifth grade science class…..Water and Light! The correct balance is the only hurdle to jump. Too wet and you get moldy seeds. Too dry and they don’t sprout. Too much light and they fry. Too little light and they won’t crack. Generally I find, for the light – especially in the winter – that on the kitchen counter is light enough. Assuming your kitchen isn’t in an underground bunker.

Water, on the other hand, is a bit trickier. Really you just want your seed moist, but not wet – and certainly not soaking in a pool of water. It is best to moisten them twice a day.

Well, ok now – Get To Sprouting!!! and look out for my post on what to do with all the sprouts you now have!

(The first photo in this post was borrowed from this blog: http://www.insonnetskitchen.com/sprouted-lentils/ )

From Restaurant Chef to Home Cook

In my new life, the one where I live in the woods and my better half is in school (ie we are broke) I find myself cooking more at home than ever before in my life. I cook as much as possible to avoid buying things, as in I make granola so we don’t have to buy cereal. Not only is this cheaper, and usually tastier, but it also lets me control what is going into our food. My granola has organic oats, dried cranberries, nuts, organic flax seeds, honey, and coconut oil – that’s it, no weird preservative or packing gas or additives.

I have taken to this lifestyle quite quickly, probably on account of my cheffing background – the idea of making something from scratch that will last for a while (in quantity and quality) is not foreign to me. thinking in kitchen I want to share with you the tricks I have picked up over the last several months of my domestication.

I buy lots of milk on sale (which is usually close to it’s expiration date) then I turn it into kefir or yogurt after a few days of using it. Doing this extends the life of the milk and you can still use it for pretty much everything you can use milk for (the yogurt you make will undoubtably be the thin “drinkable” kind). I use it in place of any milk product for baking (great in scones, biscuits, cornbread), eat it on my morning granola (sometimes with a slash of milk to lighten the tartness of it), or add it to smoothies. The great news is, these homemade delights have the same nutritional value as milk, with the addition of probiotics (great for immune health and easier digestion), B vitamins, and phosphorus.

I buy all our beans dried. Canned beans are not only packed with salt and weird preservatives and other CRAP, but they usually have such a miserable texture, too. You don’t have to soak your beans if you don’t want to, just set them to boil and cook them until done – better yet, get acquainted with a pressure cooker. I like to cook lots of beans at one time and then freeze what I don’t use in small ziplock bags, that way I can just pull out a bag of chickpeas whenever I want to make hummus or a bag of kidney beans when I want to make red beans and rice.

Making granola instead of buying cereal. Holy smokes cereal is SO expensive. Granola is easy and relatively cheap to make – and much better for you than most of the cereals out there. (I am working on a granola/granola bar blog post.)

Don’t buy things in boxes: make your own crackers (they last for a really long time!), make your own cookies (it literally take 15 minutes to put the dough together), make your own granola bars!, make your own mac’n’cheese, make your own stock, and definitely don’t say to yourself “It’s too expensive/time-consuming/hard” because if it is nominally more expensive, it is MUCH better for you and your family – if it takes a little longer, then think about how this can become family bonding time (you can even still watch your favorite shows while you do it) – and everything is hard the first time, the more you do it the easier it becomes and the faster you get at it.

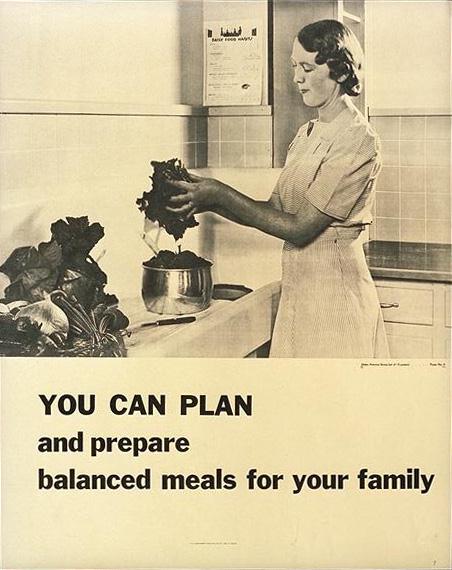
Think before you shop and cook. Plan at least some (if not all) of your meals ahead, to stop yourself from buying frivolous or unnecessary foods. I usually plan my meals for the week around the protein or a theme, like : Thursday we have that pork roast, so I’ll need sides for that & Friday I want to make Mexican, how about cheese enchiladas & etc. Think of how your ingredients can work from one meal to another – you have a lot of rice leftover from Mexican night, then make chicken and rice soup with that chicken stock you have in the freezer. Planning is really the key to saving money and your mind! Get everyone involved, have fun with it. (Check out my meal planning post!)

Make food you can enjoy all week long. On sundays I like to make one soup and one salad (like potato salad, quinoa salad, pasta salad), this way when someone gets peckish there is always something to grab in the fridge. And it’s even hearty enough to serve as the “I don’t feel like cooking tonight” dinner.

Freeze. Freeze. FREEZE! The freezer is your best friend when it comes to saving time and money. Making soup, stock, bread, beans, pastries (like empanadas or samosas), and sauces in bulk and freezing them gives you something made and ready to heat up for a quick and cheap dinner – or – buy big pieces of meat or meat/fish/chicken on sale and freezing it can save you lots of money.

You don’t need years of culinary training or tons of money to make great meals for you and your family – just a sense of planing and a few great recipes under your belt. Let me know if you want any simple recipes to get your foundation started – I suggest a soup or two, a great pasta dish, a great bean dish, a braised meat dish, and (of course) granola!

menu planning: now not lame

“Meal Planning” – I know, the phrase makes you a little sick to your stomach either with anxiety or with the sheer lameness of it all. “Meal planning is for boring suburban housewives” is swarming around your head. Well party people, I am here to tell you that this is just not simply true. Meal Planning is For YOU!!! meal planning Even if you are an awesome rock star, a revered DJ, or an edgy artist – you still need to eat. And if you have these aforementioned careers, than you are most likely pretty damn broke . So instead of subsisting off of PBR, frozen pizza, and bumming food off of your friends that cook – it’s time to do the cool thing: plan your meals and then cook them. There is no better way to stick it to the man than to cook your own damn food! I really feel passionate about meal planning for a dual reason: I am an industry trained chef (i.e. planning is super super important to a financially viable and lower stress kitchen) and my better half is currently a student (i.e. we are broke as a joke). Life is better when I can plan what we eat because this means:

  • I can budget our tiny income.
  • I can control what goes into our food, instead of opening a box of CRAP made in a factory and hope that the owner of said corporation has my best health interests in mind.
  • Making food from scratch doesn’t become a burden when I plan it.
  • I can reuse ingredients over and over, i.e. the I bought a lot of butternut squash on sale and roasted it all, we ate some for dinner with salt and pepper and then I used the rest to make a big batch of soup which we ate all week long. I got strawberries on sale which I used in morning granola, made strawberry cookies, and then turned the rest into jam – and did this all in under an hour.

Just because you meal plan, doesn’t mean you can’t go out to eat or have an impromptu meal – it just means you help yourself by having a few meals a week planned out. There are a few steps before you can even really start:

  1. Be honest with yourself. This isn’t the time to be all like “I’m going to make every single thing I eat from scratch!!” and burn yourself out in a week. Start slow, be honest, do you really want to make mac’n’cheese from scratch? or does that blue box beckon.
  2. How much time do you actually have to commit to this? It will take a while at first, but once you get the hang of your favorite recipes (and maybe bribe your friends to help) the whole process will go by so much faster.
  3. How much money do you really have for food? This is tricky, but this is supposed to save you money – not force you to buy the most expensive organic ingredients. Go to the store with a calculator and a budget in mind. Don’t buy crap you don’t need.

Now that you have an idea of how much time, money, and energy you have for this – then you can start deciding what you will make for the weekly meals. First let’s trim what you don’t need and see how we can make it at home. These are the places that I always spent too much money as a hip young person:

  • Breakfast. Oh god, so many breakfasts at the neighborhood coffee shop or diner – that’s at least $10-$15 that would have cost me like $4 if I had eaten at home. Make yourself some oatmeal with fancy toppings, cook an egg and pull some sausage from the freezer and I’m sure you know how to toast bread.
  • Lunch. So so so many lunches out before my night shift, or the famous “there-is-nothing-in-the-refrigerator-so-I-have-to-go-out.” Make yourself some damn soup on Monday and eat it all week long. Have a quinoa salad made with nuts and dried fruit and ready to eat. Add a hunk of delicious bread that you keep in your freezer (frozen bread is a miracle) and you have a full meal.
  • And coffee, it really can be good at home – I’m pretty sure you won’t die without your $5 double cappuccino, save that for when you really need it.

If you can make most of your breakfasts, lunches, and at least two dinners a week – you’ll be making so much happy progress! Now for meal planning! This part is the easy part:

  1. Decide what you want/need to make.
  2. Decide when you can make it.
  3. Make a shopping trip.
  4. Cook!!!

My week is a little like this: shop Wednesday and Sunday – Do bulk cooking on Sunday and Monday, and cook dinners as many nights as I can. Here are some links to some actual menus that might be helpful: The Nest Modern Meal Planning Cheap Healthy Good The Kitchn There are even websites that will do it for you: Food on the Table & The Fresh 20