Holy Granoly.

Most of my life I’ve been like, “What’s the big deal about granola!?” Even when we made it at Local Harvest, I thought “this is good, but….I don’t get it.”

Until recently when I couldn’t afford $4 boxes of cereal (and frankly didn’t want to eat that sugar laden, preservative filled, GMO’d stuff) and needed another option. Once I made my own granola, I was blown away by how delicious it was. Maybe because I made it myself, or maybe because I took care in choosing the ingredients – but whatever it was, I hadn’t eaten granola so satisfying before.

Since I started making granola in my own kitchen, I can’t stop eating the stuff. And I can change the flavor as much as I like and I control the ingredients completely. After about five months of eating it, I’m not sick of it yet.

IMG_1967

Granola is simple. Generally it is just oats (old fashioned rolled oats – not instant or steel cut) and nuts, covered in a mixture of sweet (sugar, molasses, honey) and fat (oil, butter) then baked for a short time. I recently made three different granolas, to show you the range of fats and sugars you can use – as well as the different things you can throw in, from nuts to dried fruit. These recipes yield a very small amount of granola, I usually make about 3 or 4 times this much and it lasts for at least a month in an airtight container.

The basics of granola making are: heat sugar and oil mixture (with other flavors if you desire), stir into oats and nuts, spread on cookie sheet(s) and bake at 250 – 300 degrees for about an hour, mixing and rotating often. Once it has cooled, mix in dried fruits, chocolate, or anything else you want to use raw.

IMG_1944

Honey Butter Granola

This is a light granola with a subtle flavor, the honey gives it just a slight sweetness.

1/2 c honey

4 Tbl butter

1/2 tsp vanilla

pinch of salt

2 c oats

1/2 c pecans (raw and chopped)

1/4 c sunflower seeds (I used roasted, but you can use raw)

1. Place honey, butter, vanilla, and salt in a small pot – heat until butter is melted and everything is combined.

2. Place oats, pecans, and sunflower seeds into a bowl – stir in honey butter mixture.

3. Once well mixed, spread onto cookie sheets in a thin layer and place into a 250 degree oven.

4. Turn pans stir granola every 20 minutes for an hour. The granola will still seem soft, but once it dries it will harden into perfectly crunchy granola.

IMG_1955

Molasses Hazelnut Granola

This is a darker granola, with a richer flavor. I love using unsulphured molasses for it’s complicated flavor and it nutrients. Reminds me of gingerbread a little bit. 

1/4 c brown sugar

2 Tbl unsulphured blackstrap molasses

2 Tbl grapeseed oil

1/2 tsp cinnamon

pinch of salt

2 c oats

1/2 c hazelnuts (chopped)

1/4 c flax seeds


1. Place brown sugar, molasses, oil, cinnamon, and salt in a small pot – heat until everything is combined.

2. Place oats, hazelnuts, and flax seeds into a bowl – stir in sugar oil mixture.

3. Once well mixed, spread onto cookie sheets in a thin layer and place into a 300 degree oven.

4. Turn pans stir granola every 20 minutes for an hour. The granola will still seem soft, but once it dries it will harden into perfectly crunchy granola.

IMG_1957

Super Seed Granola

This is called Super Seed, not only because I used a couple different kinds of seeds, but I also used a Garden of Life product called Super Seed to add flavor and fiber to this granola. This granola uses coconut oil and agave, giving it an interesting flavor.

*Note: you can replace the 1/4 c brown sugar with 1/4 c agave.

1/4 c brown sugar

2 Tbl coconut oil

2 Tbl agave

pinch of salt

2 c oats

1/4 c Super Seed

1/4 c sesame seeds

2 Tbl pinenuts

1/4 c pepitas

1. Place brown sugar, agave, coconut oil, and salt in a small pot – heat until everything is combined.

2. Place oats, Super Seed,sesame seeds, pine nuts, and pepitas into a bowl – stir in agave oil mixture.

3. Once well mixed, spread onto cookie sheets in a thin layer and place into a 250 degree oven.

4. Turn pans stir granola every 20 minutes for an hour. The granola will still seem soft, but once it dries it will harden into perfectly crunchy granola.

IMG_1958


Go crazy! Try anything! Let me know how it works out.

And if you don’t want to make your own, Sarah Kate makes amazing granola for sale various times of the year – I suggest getting yourself a bag (she evens ships it).

oiling your wood.

One thing life has taught me, is that some things really are made to last – and there are definitely some kitchen equipment I plan to have for my lifetime. Our throw-away culture is destroying our minds into thinking that most of what we have is disposable. So treat it rough, with American panache, and then dump it in the trash.

Well, I’m here to tell you that your things – with a little cultivation – can remain functional for a long, long time. In specific, you wooden equipment will smile at you if you follow two simple rules: do not soak and oil regularly.

Below I have included pictures of my sadly neglected wooden cutting boards and spoons that I loved up on and oiled on one side, to show you the contrast.
IMG_1683 IMG_1686

The hows and whys.

Why wood? First of all, I prefer wooden equipment for many reasons – some of which are: they are aesthetically pleasing, they feel best to the touch, unlike plastic they don’t leach nasty chemicals and they don’t give bacteria a happy home to breed, they are easier on your pans and knives (respectively), they are heat resistant, and they last a long time.

Why oiling? Wood is natural substance that dries over time. When wood dries it shrinks (that is why your cutting boards will pull apart at the seams) and becomes brittle. Heating wood and washing it with soap further dries it out. Regular oiling with proper food-grade oil keeps your wood soft, which keeps it from cracking, warping, splitting, or splintering – and they will also retain their color longer.

How to clean your wood. Soap is fine, some people like bleach – but I think it is unnecessary (see link above about wood’s natural anti-bacterial properties), but never place wooden items in dishwasher (too much water and heat) or leave soaking (this will cause your equipment to soak up water and expand, leading to cracking and warping).

What kind of oil? You want to use a food-grade oil that is not prone to rancidity. Olive oil does not work, because it will go rancid quickly (if it’s not already, check out how gross olive oil can be). Use mineral oil, a mixture of mineral oil and beeswax, or you can buy a pre-prepared oil in a bottle just for the occasion (pictured below).

How to oil your wood. Now that your wooden spoon/cutting board is clean and dry, rub oil on generously with a soft cloth and leave to soak in for up to 24 hours. Then wipe off with a clean cloth and you’re done! Simple as that. Repeat once a month.

IMG_1690 IMG_1691 IMG_1698 IMG_1699

IMG_1702

unoiled side

IMG_1704

a generous greasing, waiting to be wiped off

IMG_1703

after oiling

IMG_1710


For some great heritage made spoons - check out my friend James Blackwood at Pretty Good Mules!

For some great heritage made spoons – check out my friend James Blackwood at Pretty Good Mules!


Ans a little wood wisdom from James:

Wood will expand and contract as it absorbs and gives off water. Unfortunately, it does that much better at the surface (especially the end grain) than on the inside and all that movement over an unchanging interior will cause cracks and fissures. Adding an oil or oil/wax finish helps stabilize the moisture content of the wood in the face of all the hydrological vagaries of a kitchen.

Mineral oil and the butcher block conditioner you indicate are good options for treating wooden items. It’s a bit more expensive, but for most things I’ve gone to using flax seed oil. It is a hardening oil which will slowly build up a finish as it oxidizes. This is a very slow process, a single application of oil not wiped from the object may take up to 6 months to dry fully, so just keep applying it as you mention in the article. Wipe it on. Give it a few hours or a day to rest and then wipe away the excess. Slowly it will build up a more durable finish. Another option is walnut oil, but I’ve seen some quibbling over nut allergies sensitivity and I don’t want to take the chance, though I personally know folks that swear by it.

menu planning: now not lame

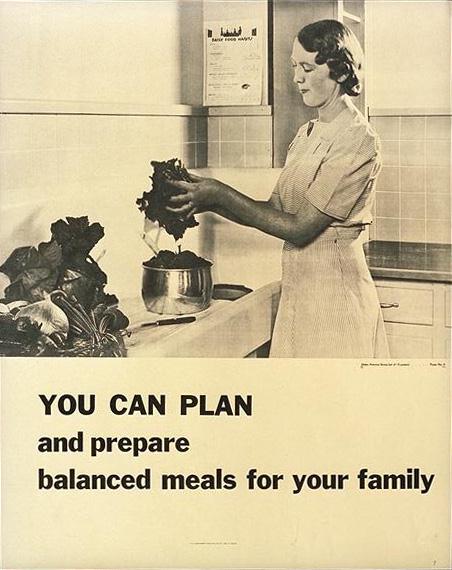
“Meal Planning” – I know, the phrase makes you a little sick to your stomach either with anxiety or with the sheer lameness of it all. “Meal planning is for boring suburban housewives” is swarming around your head. Well party people, I am here to tell you that this is just not simply true. Meal Planning is For YOU!!! meal planning Even if you are an awesome rock star, a revered DJ, or an edgy artist – you still need to eat. And if you have these aforementioned careers, than you are most likely pretty damn broke . So instead of subsisting off of PBR, frozen pizza, and bumming food off of your friends that cook – it’s time to do the cool thing: plan your meals and then cook them. There is no better way to stick it to the man than to cook your own damn food! I really feel passionate about meal planning for a dual reason: I am an industry trained chef (i.e. planning is super super important to a financially viable and lower stress kitchen) and my better half is currently a student (i.e. we are broke as a joke). Life is better when I can plan what we eat because this means:

  • I can budget our tiny income.
  • I can control what goes into our food, instead of opening a box of CRAP made in a factory and hope that the owner of said corporation has my best health interests in mind.
  • Making food from scratch doesn’t become a burden when I plan it.
  • I can reuse ingredients over and over, i.e. the I bought a lot of butternut squash on sale and roasted it all, we ate some for dinner with salt and pepper and then I used the rest to make a big batch of soup which we ate all week long. I got strawberries on sale which I used in morning granola, made strawberry cookies, and then turned the rest into jam – and did this all in under an hour.

Just because you meal plan, doesn’t mean you can’t go out to eat or have an impromptu meal – it just means you help yourself by having a few meals a week planned out. There are a few steps before you can even really start:

  1. Be honest with yourself. This isn’t the time to be all like “I’m going to make every single thing I eat from scratch!!” and burn yourself out in a week. Start slow, be honest, do you really want to make mac’n’cheese from scratch? or does that blue box beckon.
  2. How much time do you actually have to commit to this? It will take a while at first, but once you get the hang of your favorite recipes (and maybe bribe your friends to help) the whole process will go by so much faster.
  3. How much money do you really have for food? This is tricky, but this is supposed to save you money – not force you to buy the most expensive organic ingredients. Go to the store with a calculator and a budget in mind. Don’t buy crap you don’t need.

Now that you have an idea of how much time, money, and energy you have for this – then you can start deciding what you will make for the weekly meals. First let’s trim what you don’t need and see how we can make it at home. These are the places that I always spent too much money as a hip young person:

  • Breakfast. Oh god, so many breakfasts at the neighborhood coffee shop or diner – that’s at least $10-$15 that would have cost me like $4 if I had eaten at home. Make yourself some oatmeal with fancy toppings, cook an egg and pull some sausage from the freezer and I’m sure you know how to toast bread.
  • Lunch. So so so many lunches out before my night shift, or the famous “there-is-nothing-in-the-refrigerator-so-I-have-to-go-out.” Make yourself some damn soup on Monday and eat it all week long. Have a quinoa salad made with nuts and dried fruit and ready to eat. Add a hunk of delicious bread that you keep in your freezer (frozen bread is a miracle) and you have a full meal.
  • And coffee, it really can be good at home – I’m pretty sure you won’t die without your $5 double cappuccino, save that for when you really need it.

If you can make most of your breakfasts, lunches, and at least two dinners a week – you’ll be making so much happy progress! Now for meal planning! This part is the easy part:

  1. Decide what you want/need to make.
  2. Decide when you can make it.
  3. Make a shopping trip.
  4. Cook!!!

My week is a little like this: shop Wednesday and Sunday – Do bulk cooking on Sunday and Monday, and cook dinners as many nights as I can. Here are some links to some actual menus that might be helpful: The Nest Modern Meal Planning Cheap Healthy Good The Kitchn There are even websites that will do it for you: Food on the Table & The Fresh 20